Yes, you guessed right! It’s sourdough starter I’m talking about. This amazing ‘creature’ everybody has been playing with in their home kitchens over the last few months, and especially during the lock-down caused by the pandemics all over the world. ‘Cause what better activity to fill your time with?
I am at my very own third time giving it a shot. And this last one is the best one so far. Also because I’ve been much more involved. I gave it more time than ever. And I was lucky enough to have been surrounded by awesome passionate bakers happy to share their knowledge with me. But I’ll keep it short this time and jump straight to what worked best for me this last time when I started my sourdough starter. However, if you’re curious to find out more about my sourdough journey so far, I wrote a little story about that, here.
Before getting started…
Building a sourdough starter will require a lot of patience and consistency, I can’t stress that strong enough. So try to think about how a feeding schedule can fit into your day, if you would be able to give it 5 to 10 minutes every morning and evening, to get to a strong happy starter.
You might also want to get a small notebook and take notes about what you’re doing along the way. Just in case things won’t go the way they should at some point. Because that can happen – I’m talking more about my experience with that in my previous post ‘My little Sourdough Bread Baking Story’.

Please treat this and any other guide on how to begin with a sourdough starter as ‘notes on one’s personal experience’. There are so many variables that can influence the process, that results may vary from one person to another. The flour I use will be different than yours, the water, the temperature and humidity in the environment. It’s not supposed to be rocket science. Grandmas all over the world used to do it without special tools. But knowing their materials and environment. And as one that has failed without apparently any reason, I just want to let you know that, even though most of the times beginning with a sourdough starter is pretty smooth (that’s what I noticed from reading through comments of people trying out various starter recipes), it can also go wrong. And it’s nothing wrong about that. Just shake it off, and start again.
Here’s how I got started
OK, now that you know a bit about what to expect time-wise, let’s get to the technicalities. It is a 100% hydration sourdough starter that I have, so the process below will describe how to build a liquid starter. That means it will always consist of equal parts water and flour (we’re talking grams).
Ingredients:
- good quality white bread flour*
- good quality whole grain rye flour*
- water (temperature neutral to touch)**
Tools:
- kitchen scale***
- 1-2 see-through container(s)/jar(s), about 220-250ml volume****
- rubber band/ a marker pen
- filtering water jug (optional)
Notes
*I only use ecological flour, locally sourced as much as possible (unless it is a special grain that only grows somewhere else). I always check the packing date, to be as recent as possible. Try not to use flour that has been opened and standing around in your pantry for a long time. I suspect that was the reason for which one of my attempts failed. Once you open the bag, store the flour in an air tight container.
**Water on tap here in Copenhagen is a bit hard. So I always use filtered water to feed my starter.
***You’ll work with small quantities, so you need a scale that can deal with small weights.
****It can be glass or plastic, the idea is that you can see the activity inside. I use only one, but I mix the refreshed starter in a separate container. So I just rinse well the jar every time.
My day-by-day sourdough starter schedule
Day 1, morning – Choose the time that suits your schedule and you know you can always allow 5 minutes to this. For me it was 9:30 in the beginning. In a clean container pour 20g (filtered) water – it has to have a neutral temperature when you touch it. Then add 10g of the white flour and 10 grams whole grain rye flour. Mix well until all the flour is wet and it soaked in all the water. I use the teaspoon handle to mix everything together.
You can mix this directly in the container it will be sitting in, and just scrape down the batter from the edges and level it. Or you can do like me and mix everything in a tiny container/bowl allocated only for that and then transfer into the clean jar. Cover the container, but make sure it can still breathe, it doesn’t have to be tightly locked. Place in a constantly warm place in your home (over 20C, ideally 22-24C), if possible, however not in direct sunlight. Let it rest for 24 hours.
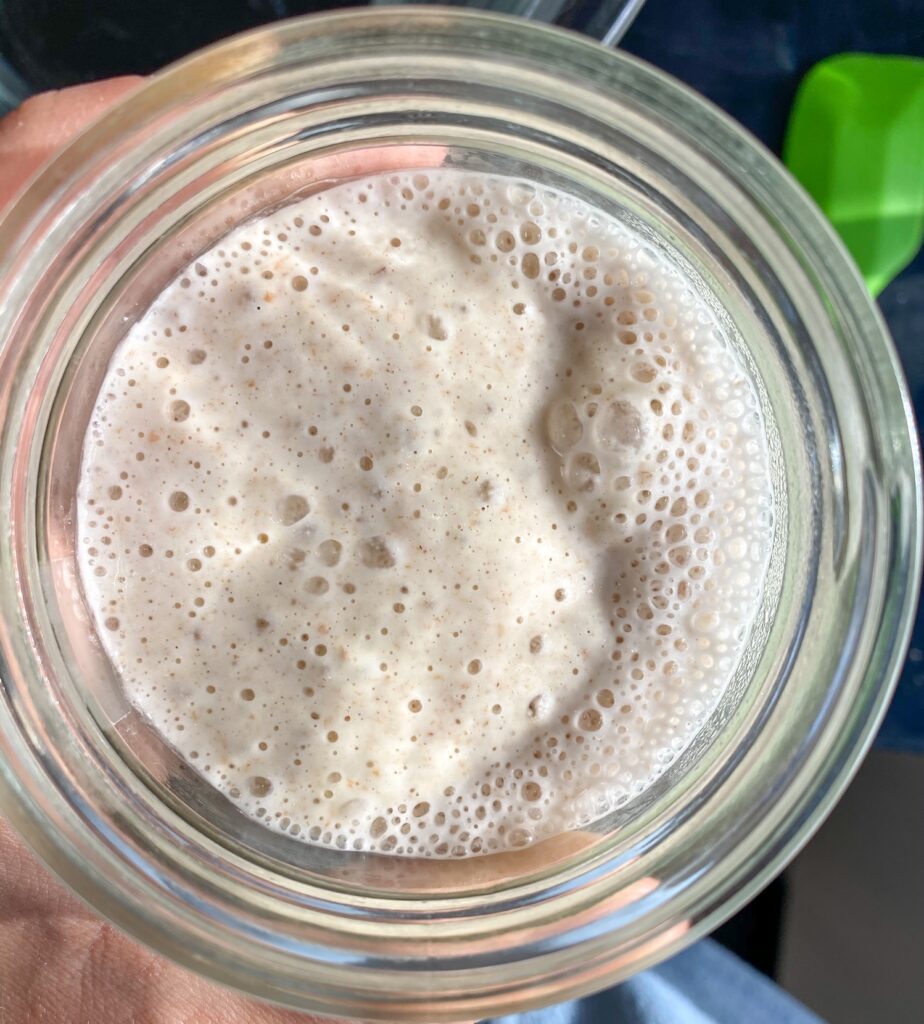
Day 2, morning – Observe if there has been any activity in there. I found mine airy and bubbly, that was a good sign of activity. It is now time to refresh it. Pour 20g (filtered) water into a clean container, then add 20g of the 1 day old ‘starter’ and mix until slightly dissolved. Discard the rest of the starter (yes, you will need to throw a little bit out in the beginning, but once you build your starter, you can use the leftovers in many other bakes). Add 10g of the wheat flour plus 10g of your rye flour, and stir everything together. Level it down or transfer to a clean container if mixing it in a tiny mixing bowl. Mark the level either with a rubber band, or with a sharpie. You’ll want to keep an eye on the levels.
This is when things can get moving. Place the jar in a warm place and let it rest. But keep an eye on it. If it will have a huge boost in volume within 10-12 hours, then it’s time to feed a second time during the day. If there’s not that much activity yet, just jump over to Day 3, morning.
Day 2, evening – Mine tripled after 10 hours that day. So I decided to feed again in the evening, about 12 hours after the morning refreshment. Fed it the exact same way as in the morning – 20g water, 20g of the ‘old’ starter, 10g wheat flour and 10g rye flour. Add to a clean container, mark the level, and let sit in a warm place, covered, over night.


Day 3, morning – Observe if there has been activity. That is why it is important to use a clean container. You’ll be able to see on the walls of the jar if there was any rise and now the starter is collapsed. Mine had doubled in volume that night. Feed the same way as the previous morning – 20g water, 20g of the ‘old’ starter, 10g wheat flour and 10g rye flour. You probably got a tiny routine by now. Mark the level, store in a warm place, and again, keep a close eye on it. Be ready to feed in the evening as well, as soon as it registers a huge jump in volume (if it hasn’t yet and you’re already feeding the second time in a day).
Day 3, evening – Once you started giving your starter a second refreshment during the day, you’ll have to stick to this schedule. It needs consistency to become stable and predictable. Feed again just the same way as the previous days.
> Day 3 – After the huge volume rise, the starter might look dormant for a day or two. It happened to me. Don’t get discouraged, just hold on to your schedule, things will get moving eventually. You’re looking after some stability from your starter. That means that you will start observing it becomes double/triple in size around the same time after it’s been fed, if the environment temperature doesn’t swing too much.
> Day 5 – After the 5th day, if you already have some constant activity in your starter, it might be stable enough for you to start shifting more to 100% wheat flour, if you wish. I personally did that, and my lovely starter, Maya, is currently 100% wheat. To do that, you can reduce step by step the rye flour quantity, while increasing the wheat flour one. I would do it by swapping 2g more every day, until you get to 18g white wheat plus 2g rye flour. Then you can swap the last 2g of rye flour with whole grain wheat flour, and you’ll get a 100% wheat starter. And you can continue with this as a base, from which to build different levains with different flours you might need for various bread types.
When is your starter ready to use?
You’ve been waiting for so long, you feel so ready to bake your first bread with your newly precious sourdough starter. But how do you know it is ready and strong enough to rise your loaves? I would say you have to wait about one week to 10 days until you get a mature starter. And that if it has had constant activity during the last few days. By that I mean that, with a normal 1:1:1 ratio feeding, it peaks after about 4-6 hours. I did my first test bake with my current starter one week after starting it, and it was ready to support a good rise and nice oven spring.
But with sourdough time is relative, so the best way to make a call is by closely observing it. Look for the signs, and if you feel you’re there, give it a shot. You can start with my beginner sourdough bread recipe. This is the exact first loaf I started with a few months ago.
How to train your dragon?
No, I didn’t actually switch to talking animation movies out of a sudden. We’re still talking about sourdough starter and how to keep it happy.
Now you have a nice young, yet mature sourdough starter, that needs your care and attention to be happy and continue giving you delicious bread. If you plan on baking 3-4 times (or more) per week, then you’ll be keeping your starter on the counter. Or wherever its favourite spot is. That means that you’ll have to feed it once or twice per day, depending on how warm it is and on your baking schedule.
In order to have a strong starter, you don’t want it to be ‘hungry’ for a very long time. So, ideally, you will want to feed it when it’s peaked and it just started to collapse. But I just told you to look after a starter that constantly peaks after 4-6h. That means we have to work around with the ratios of water and flour we feed to our starter.
You can start by trying a 1:2:2 ratio – that reads one part ‘old’ starter to two parts water and two parts flour. And then increase the water and flour ratio until you get a starter that collapses just before you’re ready to feed it again. For example, during the summer I’m feeding my starter twice a day. And because we’re having some hot days now in Denmark, the ratio I use at the moment is 1:5:5. That means I’m using 3g ‘old’ starter to 15g water and 15g total flour.
Weekend baking?
If you’re only baking once a week, then the best idea might be to keep your starter in the fridge. You have to make sure you feed it and let it rest a couple of hours, so the the activity can take off just a tiny bit. Make sure you close the container/jar well this time, and place it in the fridge.
To get your starter strong and ready again, you have to make sure you feed it at least twice before baking. I’ll take my sourdough starter as an example. Its feeding schedule is twice a day. Let’s say I’ve had it in the fridge for a week now. I decided I want to bake a loaf Sunday morning. That means I need to build the dough on Saturday. I will then take my starter out of the fridge Friday morning, leave it one hour to get to room temperature, and feed it the first time. I see it’s already been active again, so I feed it Friday evening before going to sleep. Saturday morning it’s visible the starter is back on track. I can now prep my levain, that I’ll use later when peaking, to build my bread dough.
A few final conclusions
It might look a bit laborious overall, but it’s just me trying to give as many details as I possibly can. And trust me, there’s a lot I didn’t put up there. But once you get hooked, your sourdough starter is there to stay. And you’ll get so used to taking care of it, it will just be like a member of the family.
One more thing – that part of the starter that you have to discard every time. I don’t like waste, so what I do is that I just save it in a big jar in the fridge. And that’s also why I keep a very small amount of my starter going and I prefere to build the exact amount of levain I need each time. The sourdough starter leftovers can easily be used in other delicious forms, such as sourdough crumpets, pancakes, crepes, cookies, brownies, tarts or pie crusts. I have already shared my fruit galette recipe, here, and I’ll make sure to add more including sourdough discard.
If you made it all the way here, you must be quite a patient person 🙂 So you’re already one step closer to embark on this amazing sourdough journey. Stay tuned, I’ll soon be putting together a couple sourdough bread recipes as well, so you’ll be good to go with your first loaf!
Happy sourdough starter building, everyone!


What is your reciprokke for the starter of the starter i.e day 0