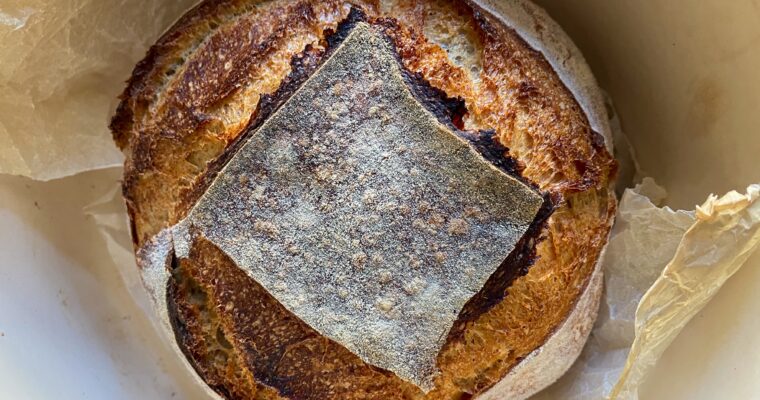
I love how some times the ‘use what you have’ approach can end up with the most fun and delicious experiences in the kitchen. It was exactly one of these moments that gave me this purple wheat sourdough loaf that I love to bake and eat most here at home. I was experimenting with my back then 4-5 months old starter, so I bought a small bag of purple wheat to make some purple wheat sourdough bread rolls with cranberries and topped with poppy seeds, that a friend of mine loves and usually gets from Meyers bakery. Thought is was a good challenge, tried it and realized it’s not something for my taste really.
So I had some of that bag of flour left, and one day it happened that I ran out of the spelt flour I used to add to my regular loaf at the time. So, in the spur of the moment I just replaced the spelt flour with the whole grain purple wheat I had in my pantry. Back then it was only 10% purple wheat that I had used, but wow! I was so impressed by the difference in taste even that little amount made. And I just fell in love with this purple wheat sourdough bread and I eventually adjusted it to the formula below.
Now this is that recipe that I know by heart and bake about 3-4 times per week. I sometimes take a break from it if I can’t find purple wheat. But I’ll always go back to it the second I get my hands again on this wheat that I enjoy so much working with.
If you haven’t started your sourdough journey yet, but thinking about putting together your own starter, check out my ‘diary’ on how I got going with mine, here. Or if you’re only starting to put your starter to work, you might want to check out my beginner sourdough bread recipe first. That uses rather common flours while this one is a bit specific.
A couple ‘disclaimers’, before you dig in my recipe
This purple wheat sourdough bread recipe, used as is, gives quite a wet dough. It can be a bit challenging to work with. If you’re at the beginning of your sourdough journey, you can still try it out, but I suggest you hold back some of the water. I would say you start by holding back 35g(for the small loaf batch)/ 50g(for the large loaf batch) of water, then increase with 10-15g at a time, until you get to use the whole amount.
Make sure your starter is strong and active, and that you already know its schedule. You get the best results when using the starter and thus the levain at their peak activity.
As it is the case with all sourdough baking, please keep in mind that there are so many variables that can influence your dough, the process, the baking. The flour I use is probably different than the one you will be using. Different flours absorb water differently. Sometimes even different batches of flour from the same producer act differently. The humidity and the ambient temperature also influence the way your sourdough will develop. It can rise faster or much slower in your kitchen than it does in mine. Dough handling will as well be different and will have an impact on your final product.
That’s just the beauty of working with sourdough, there’s no two identical bakes. And it’s a good chance your purple wheat sourdough loaf won’t turn out just as mine. So treat this recipe as a showcase of my experience, but get to know your starter, your ingredients and environment, your dough, practice and make it yours.


The flours I’m using
I usually work with stone ground flours. It can be a bit more difficult to handle and you might not get that impressive tall oven spring as you get from strong white roller milled flour, but once you get used to working with it, it goes really smooth.
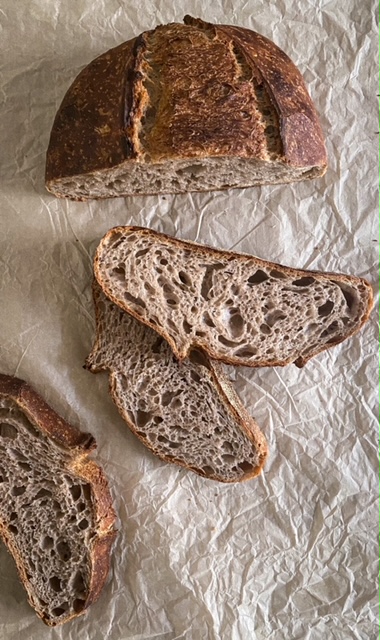
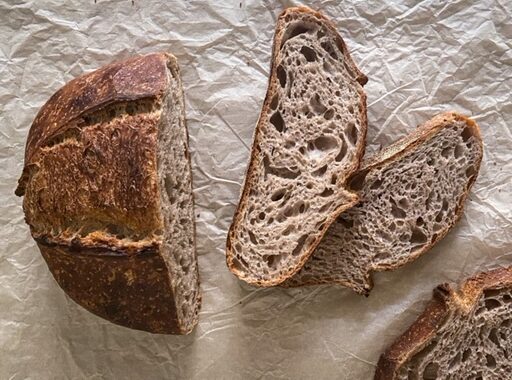
When the grains are stone ground, they are not only being processed at a lower temperature (and that seems to be very important for the flour quality), but this grinding method also preserves more of the grain. Not at the level of whole grain flours, but the fine stone ground flours are visibly more loaded than their normal roller milled counterparts. I prefer these because they simply give a much deeper taste to my loaves. And at the end of the day, behind the awesome crust and beautiful photogenic crumb, that’s what I’m after – the taste. And that is also why my loaves’ crumb is never white.
Øland wheat
If you don’t live in Denmark or Sweden, you most likely haven’t heard about this kind of wheat. It is a heritage grain specific for the Scandinavian region, and it originates from the Øland island in Sweden (where it also gets its name from). Its tiny kernels give a slightly sweet and aromatic taste. With a high protein content (13-13,5%) and good absorbing capacity, it gives a nice elasticity to the dough. So, besides me trying to use locally produced goods as much as possible, I like to include it in my breads and rolls quite often, as it makes the dough nice to work with in my opinion.
Purple wheat
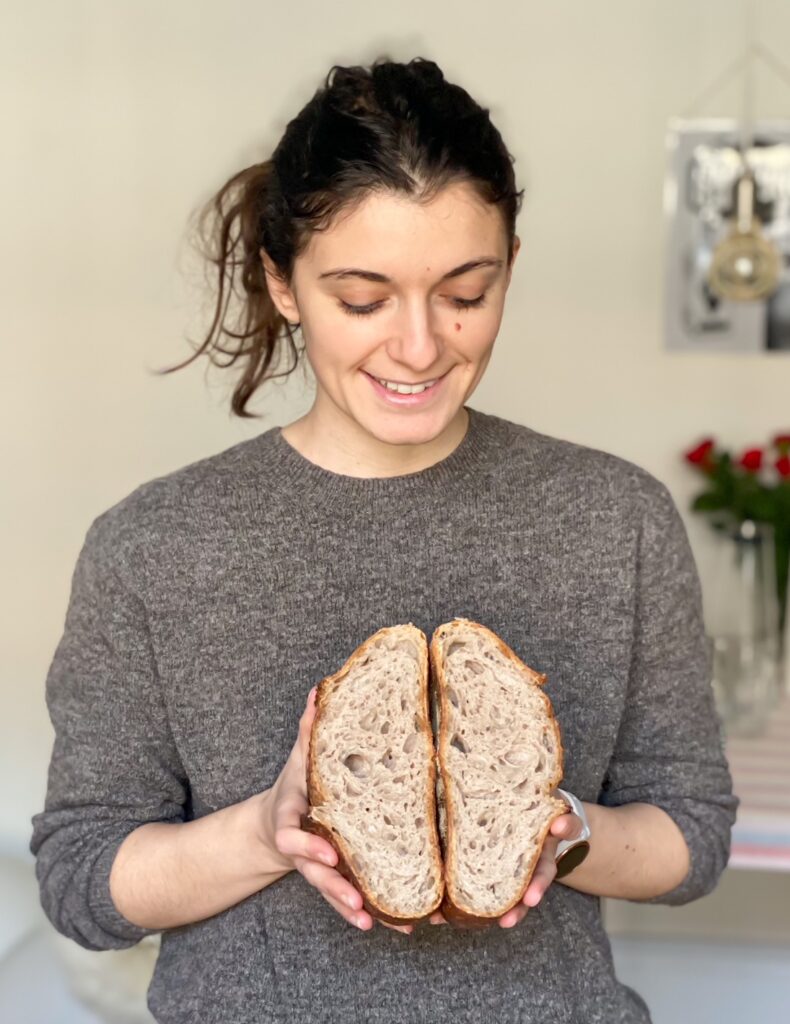
This type of wheat originates from Ethiopian highlands where it seems to have grown for thousands of years, and it has been popularized in Canada for the last few decades. Its name comes from the colour of the grain, which is purple due to the pigments known as anthocyanins, which are antioxidants also found in fruits and vegetables like beets and blueberries. That is why the dough and the crumb of bread including this kind of flour has a slight purple colour. More purple if using whole grain. The purple wheat I am using is locally grown and produced in Denmark, but it can be hard to find sometimes and I believe it is not yet too popular.
Baker’s percentages
Whenever I start building a sourdough, it’s always on paper first. It all begins with some numbers and percentages. Basically every ingredient is relative to the total amount of flour in the dough. So here’s the formula for the dough below, should you prefer working with baker’s percentages. Keep in mind that I’m considering also the flour and water from the levain when calculating. So if you’re usually not taking the flour and water from the levain into consideration when doing the percentage, and you’ll be getting different numbers than my recipe below, then you know why.
- 20% levain at 100% hydration, built on strong bread flour
- 80% water (out of which 10% is in the levain)
- 20% purple wheat
- 10% øland wheat flour
- 70% strong bread flour (out of which 10% is prefermented in the levain)
- 2% salt
After a rather long and detailed introduction (you’re a hero if you read through and didn’t jump directly to the recipe!!!), here comes the list of ingredients and the step by step process I use to make this loaf.
Ingredients
For a small loaf (fitting a 1/2kg banneton)
To build the levain:
- mature starter – 25g
- 25g filtered water
- 25g strong bread flour
To build the dough:
- 70g levain at peak
- 245g filtered water (neutral to touch)
- 70g purple wheat flour*
- 35g øland wheat flour*
- 210g strong bread flour*
- 7g sea salt
For a large loaf (fitting a 1kg banneton)
To build the levain:
- mature starter – 35g
- 35g filtered water
- 35g strong bread flour
To build the dough:
- 100g levain at peak
- 350g filtered water (neutral to touch)
- 100g purple wheat flour*
- 50g øland wheat flour*
- 300g strong bread flour*
- 10g sea salt
*At the moment I am using purple wheat flour #2 (which is somewhat in between white and whole grain) and wheat flour #1 from Kornby Mølle. The øland wheat is from Skærtoft Mølle, another local mill here in Denmark. They are all stone ground and ecological flours.
Extra:
- rice flour to dust the banneton
- flour to dust the working surface
- boiling water if baking on a stone/steel
Equipment
- kitchen scale
- transparent jar
- large mixing bowl (I use glass one to be able to observe the dough better)
- bench knife
- banneton (1/2kg one for small loaf or 1kg one for the large loaf)
- bread lame (I am using one from Simpelsurdej.dk)
- dutch oven or stone/steel for baking (I am using the Challenger Bread Pan distributed in Denmark by Cathrine Brandt)
- oven tray to produce steam if baking on a stone/steel
Method
Day 1 – levain & dough build
1. In the morning build the levain that you’ll be using later in your dough. In a jar mix the water (temperature neutral to touch), the ripe starter and the flour, in equal parts. If you have a strong healthy starter and a temperature of around and a bit over 22C, your levain will probably be peaking in 4-6 hours. Just plan according to how you know your starter’s schedule and keep in mind you usually get the best results if using it while at peak.
2. Start building the dough for your purple wheat sourdough loaf. In a mixing bowl add the water at neutral temperature. If you’ve just started working with sourdough, or you are not used working with wet dough yet, hold back about 35g of the water in the recipe. Pour the levain you built in the morning. It should be floating in the water – that is a good sign that your levain is strong and ready. With your hand or a spatula stir a bit to dissolve the levain in the water. Add the flours and with your hand or a spatula mix everything together until all the flour is wet. You are not kneading, only mixing and making sure there’s no dry flour left. Cover the bowl with a silicone lid/ a plastic bag/ a shower cap and let rest for 30 minutes in a warm place (fermentolyse).
3. Add the salt and use your hand to incorporate. Keep a bowl of water next to you and make sure to handle the dough with a wet hand, to avoid it from sticking. If you’ve held back some of the water, and feel at this point that you could handle a bit more, this is the moment when you can add an extra 10g or so. Squeeze and knead the dough in the bowl for a couple of minutes. I use a mix of Rubaud kneading method and a kind of one handed slap and fold directly in the bowl. Cover and let rest for 30 minutes more.
4. Perform a strong set of stretch and folds. Grab the dough from the edge across from you and stretch upwards as long as you can until you feel it resists. Then fold onto itself. Turn the bowl 90 degrees and repeat until you’ve completed all 4 edges. You’ll observe the dough will resist more and more each time. After performing a complete stretch & fold cover and let rest 30 minutes in a warm place.
5. Perform 3 coil folds separated by 30 minutes rest in a warm place.
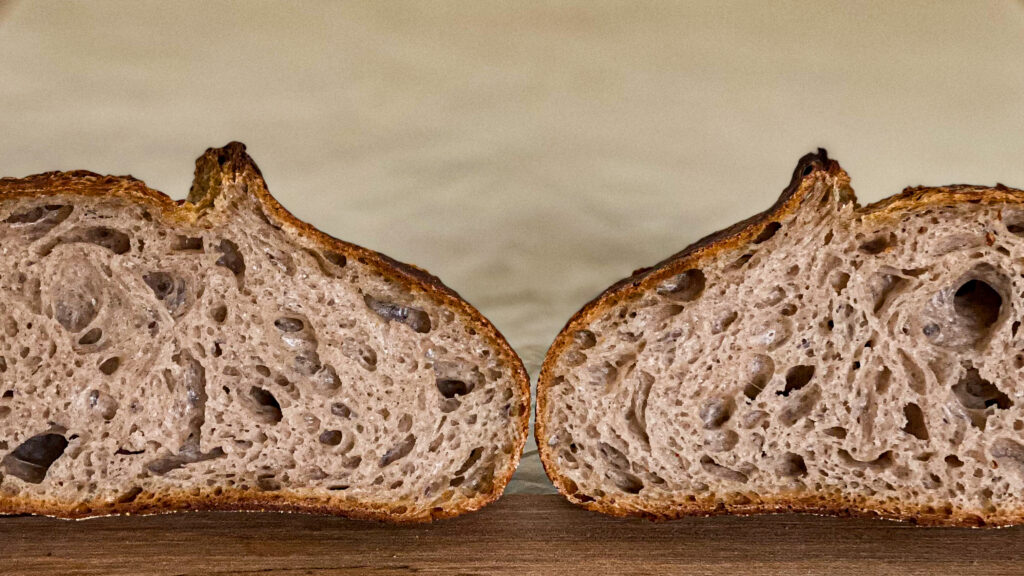
6. Let the dough finish bulk fermentation untouched, for one hour more or so. You should not keep the eyes on the time, but on the dough really. You’ll know it’s ready when it has visibly risen with 30-50% and you can see fermentation bubbles both on the sides and on the surface of the dough. That is why I like a transparent bowl, as it gives me the chance to see how the fermentation goes.
7. After the bulk fermentation is done, transfer your dough onto a clean working surface. Do not use flour just yet, as you want the dough to stick to the surface while preshaping. Preshape into a boule using your bench knife. Then let bench rest for 15-20 minutes. If the dough is very proofy, you might want to cut the bench rest shorter. Otherwise you can even let it rest for half an hour if you feel it would need some extra time before the cold fermentation stage. If you are working with lower hydration (therefore a stiffer dough) and only one loaf batch which doesn’t need cutting, you can skip preshaping and jump directly to shaping.


8. Time to shape your loaf. Lightly flour the dough and the working surface. With the help of your bench knife turn the dough upside down onto the floured surface. Shape into a boule or battard, depending on the shape of your banneton. Let the shaped dough rest on unfloured surface for a couple minutes so it sticks together.
9. Lightly dust your banneton with rice flour, then gently transfer the shaped dough upside down in it, with your lightly floured hands and bench knife. If you feel there’s not enough tension in your dough, you can stitch it a bit after placing in the banneton. Cover (I use a cotton cover, but a plastic bag will work just fine) and place in your fridge to cold ferment overnight (4-6C, for 12-20 hours).
Day 2 – baking
1. Check your dough and observe if it’s ready to bake. Some people use the poke test to see if it’s ready to bake (check the video below). But with time you’ll just get to know how much of a rise is a good rise and it’s not under or over proofed.
2. Place your dutch oven in the oven, turn the heat to 250C and preheat for about one hour.
If you’re baking on a stone/steel, place it in the middle of the oven and an oven tray on the lowest rack and preheat at 250C for 45-50 minutes. A couple minutes before baking, boil some water in an electric kettle or in a small sauce pan.
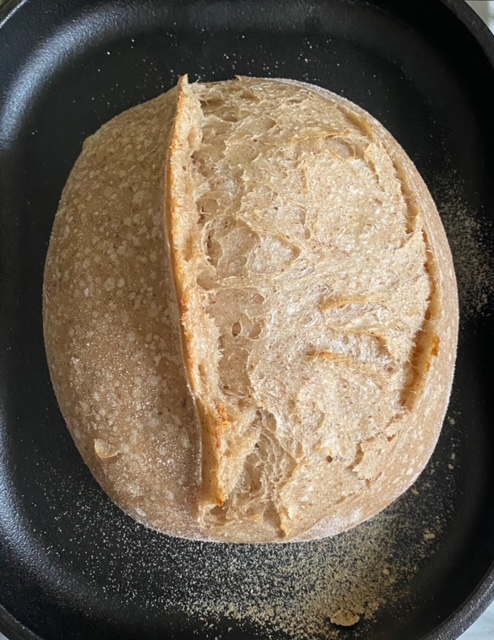
3. I always bake my loaves straight from the fridge. Take the cover out, add a little corn flour or semolina on top and gently roll your loaf out either on a baking paper that will help you transfer it into your dutch oven (if you’re using a deep one), or directly onto your baking pan if using a Challenger or a Lodge Combo Cooker. Score your loaf to your liking. Place the lid back and return to the oven. Bake with lid on for the first 18 minutes (20 if you’re baking the large loaf), then remove and finish baking at 230C for 20 minutes more (or about 25 if you’re baking the large loaf). Or until you get the desired coloration. I like my bakes rather darker.


If you’re baking on a stone/steel, roll the cold dough on a piece of baking paper on your loading tray. Score then gently and carefully slide on the hot stone/steel. Pour about 300ml hot water in the preheated oven tray and quickly close the door. Bake with steam for the first 18 minutes (20 if you’re baking the large loaf), then carefully open the door of the oven to release the steam. Reduce the temperature to 230C and finish baking for 20 minutes more (or about 25 if you’re baking the large loaf). Or until you get the desired coloration.
4. The loaf is ready when it feels light and tapped on the bottom it sounds hollow. Let cool down on a cooling rack for at least two hours before slicing. The crumb will continue to cook inside for a while. Then slice and enjoy with a good amount of butter or with olive oil and salt. Or just simple. Its delicious nutty notes pairs well with matured cheeses and jams such as my slow-cooked no added sugar plum jam.


Should you have any questions on the process or just want to share your experience, please write to me in comments below. Or feel free to drop me a DM on insta. I’m always happy to talk bread.
Happy Baking, everyone!
PS:
“Find yourself someone that looks at you the way I look at my loaves of bread” 🙂
Sourdough bread with purple wheat
Equipment
- kitchen scale
- transparent jar
- mixing bowl
- bench knife/ dough scraper
- banneton (1/2 kg)
- bread lame/ sharp serated knife
- dutch oven/ baking stone/steel
- oven tray to produce steam if baking on a stone/steel
Ingredients
Levain build
- 25 g mature starter
- 25 g filtered water temperature neutral to touch
- 25 g strong bread flour
Dough build
- 245 g filtered water temperature neutral to touch
- 70 g levain at peak
- 70 g purple wheat flour whole grain if possible; stone ground will also work
- 35 g øland wheat flour stone ground
- 210 g strong bread flour stone ground
- 7 g sea salt
Extra
- flour to dust the working surface
- rice flour to line the banneton
- semolina/ corn flour (optional) for baking
- hot water if baking on a stone/steel
Instructions
Day 1 – levain and dough build
- Build the levain in the morning. In a jar add the water, starter and flour and mix well. Place in a warm spot until it rises to its peak level (4-6h, depending on your starter's schedule).
- When your levain is at peak, start building the dough. In a mixing bowl add the water, then the levain and stir a bit until the levain dissolves. Add the flours and with your hand or with a spatula mix everything together until all the flour is wet. Make sure there are no pockets of dry flour left. Cover and let rest in a warm place for 30 minutes (fermentolyse).
- Add the salt and dimple into the dough with your wet fingers. Fold the edges to cover the salt, then squeeze and start working the dough so the salt distributes well. I use a mix of Rubaud kneading method and a one handed slap and fold directly into the bowl, for about 2 minutes. Cover and let rest for 30 minutes more.
- Perform a strong stretch & fold. Cover and let rest another half an hour in a warm place.
- Perform 3 coil folds separated by 30 minutes. Handle the dough as gentle as possible towards the end, as it's becoming more airy. If you feel it is already strong enough and holding its shape, perform only half a fold. Listen to the dough.
- After the last coil fold let the dough finish bulk fermentation in a warm place, untouched. For mine it usually takes about one hour more. But look at the dough rather than at the time. You are looking for visible signs of rising (30-50% rise) and fermentation bubbles on top and on the side if using a transparent bowl like I do.
- Transfer the dough on your clean working surface. Use your bench knife to preshape the dough, the let bench rest 15-20 minutes. If the dough is already very proofy, cut the rest short at 15 minutes. If you feel it would need some extra fermentation, you can let it rest for up to 30 minutes or so.
- Lightly dust the preshaped dough and your working surface. Use your dough scraper to turn the preshaped dough upside down on the floured surface. Gently shape your dough in your desired way – boule or batard. Let rest on an unfloured surface for a couple minutes, so it sticks back together.
- Meanwhile lightly dust the banneton. Then gently place the shaped dough in it and stitch if you feel the dough needs a little extra tension. Cover and place in the fridge for cold fermentation overnight (4-6C for 12-20h)
Day 2 – baking
- Check your dough and observe if it's ready to bake – you can do that with the poke test.
- Preheat the oven with the dutch oven (or baking stone/steel and oven tray) inside, at 250C for 45min-1h. If baking on a stone/steel boil some water 5-10 minutes before baking.
- Dust the surface of your proofed loaf with some semolina or corn flour and gently roll out directly in your bottom side of your dutch oven, or on a baking sheet if you have a deep dutch oven or baking on a stone/steel. Score as desired. Cover and return to oven and bake covered for the first 18 min. If baking on a stone/steel, carefully slide the loaf on the hot stone/steel in the oven using a loading tray, then pour about 300ml hot water in the oven tray underneath and quickly close the door to retain the steam.
- Remove the lid carefully and return to oven to finish baking. If baking on a stone/steel, carefully open the door to release the steam. Reduce the heat to 230C and continue baking for 20 minutes more, or until you reach the desired coloration. The bread is ready when it feels light and tapped on the bottom it sounds hollow.
- Let rest on a cooling rack for at least 2h before slicing. The crumb continues cooking inside for a while after taking it out of the oven. Enjoy!