It was about 3 years ago that I started being interested in making one of those mesmerizing cakes that took over the internet – a mirror glaze cake. It was about the time when my friends here in Copenhagen started being excited about my cakes and it was that thing I would make for their birthdays. So I just decided I have to give it a try to this mirror glaze cake madness. I went and bought a silicone form, I already had a kitchen thermometer, so I was ready.
Before getting started, I watched loads of videos about mirror glaze, how and under what conditions to pour a perfect one. I already had an idea about what should go underneath. And I was super excited to get started. It was a fairly long process. I think that time I had split the process over 3 days. First day I got all the ingredients ready, baked the cake base and prepped the fruit insert (in that case it was a lemon curd). The next day I started building the cake. Had the lemon curd placed in the freezer to set. And later that evening started working on the mousse.
A time for beginnings
It was also the first time I was making a white chocolate mousse. It didn’t go without challenges. I was stressed I’ll over beat it. Didn’t do it that time. Beginner’s luck probably, as I did it on my second mirror glaze cake attempt 🙂 But what I did the first time, was to realize the mousse portion I had just made wasn’t enough to fill the silicone form I had. Oh well… I just had to do more and eventually ended with a decent cake to set in the freezer overnight.
Now the big day was there. The day of the birthday party this mirror glaze cake was for. No pressure, Ioana, hahaha! I had also seen so many failed attempts on the internet, and I was strongly hoping my experiment won’t transform into one of those. Luckily things went well and I had a mirror glaze cake to bring to the party. A pretty delicious one, I would dare to say, judging by the fact that one of the guys had 3 slices. The mirror glaze might’ve not been so mirror-y that time, but I was quite happy with my first attempt (check it out on my Insta, everything’s saved under a ‘Mirror glaze’ highlight). And taste is the most important after all, in my opinion. So since I had that nailed, I knew I was about to make this cake many more times.
My favourite combo
With time, this mirror glaze cake got better technically. I got myself a much better silicone form. I learnt which kind of chocolate works best. And I did of course try a few different combos of fruit insert and mousses. The one I have settled on, and that seems to be a favourite among friends as well, is the caramelized white chocolate mousse with passion fruit & lime curd insert. And for a good reason, I believe. The passion fruit & lime curd’s delicate tanginess balances out so well with the caramelized sweetness of the mousse. And all in an extremely elegant form. As I also like to keep the decoration as simple as possible on my mirror glaze cake. I find simplicity soothing for the eye, and very appealing for those of us that also eat with their eyes.
As for the process, even though it might seem a bit lengthy, it actually does not take more than two hours of active hands on involvement. It’s mostly setting and waiting. And I love how this cake’s building process can be stretched over 3 days. This makes it so easy to plan on busy working days for example, since you only need to spend half an hour or so every evening to prep bit by bit and easily climb your way towards its final form.
So, are you ready to give it a shot? Here’s my recipe for this mirror glaze cake, hiding e delicate caramelized white choc mousse and a passion fruit & lime curd insert under its shiny coat.
Ingredients
For the dark cocoa cake base:
- 100g all-purpose flour
- 30g pure cocoa powder
- 1/2 tsp. baking powder
- 1/2 tsp. baking soda
- 1 egg
- a pinch of salt
- 100g caster sugar
- 30g vegetable oil (I use rapeseed)
- 100ml kefir (or buttermilk, or creamy yogurt)
- 100ml boiling water
For the passion fruit & lime curd:
- 5-6 passion fruits
- 1-2 limes
- 6 egg yolks
- 1 whole egg
- 100g caster sugar
- 30g unsalted butter
For the mousse:
- 2tsp. gelatin powder
- 3tbsp. cold water
- 200g caramelized white chocolate, chopped (or white chocolate if you can’t find the caramel one)
- 140g whipping cream
- 500ml whipping cream, chilled
For the mirror glaze:
- 2 heaped tsp. gelatin powder
- 50ml cold water
- 100g sweetened condensed milk
- 150g caster sugar
- 25g cocoa powder
- 100ml water
- 175g dark chocolate (I use 54,5%, don’t go higher than 55%)
Extra, for decoration:
- crunchy dulcey pearls
Tools
- a whisk
- 1-2 small spring forms (I use a Ø19cm and a Ø22cm)
- a heat resisting bowl
- silicone mold Ø24cm
- stand or hand mixer with whisk attachment
- plastic film
- cake leveler/cutting wire (optional)
- kitchen/chocolate thermometer
- immersion blender & a tall cup
- a sieve
Instructions
Phase 1 – prepping the elements
- Bake the cake and prepare the passion fruit & lime curd 1-2 days ahead. Preheat oven to 170C (no fan). In a small bowl add the flour, cocoa, baking powder and baking soda, stir with a fork and set aside. Place some water to boil into a kettle. Meanwhile, place the egg, a pinch of salt and the sugar in a medium bowl and mix by hand with a whisk for a minute or two, until pale yellow. Add the oil and whisk again until you get a creamy consistency. Then add the kefir/yogurt and whisk again just until combined. Pour the boiling water while stirring with the whisk. Then run the flour and cocoa mixture through a sieve directly into the mixing bowl. Whisk until combined. You will get a runny batter, that is how it’s supposed to be.
- Pour the batter into the Ø22cm spring form, lined with baking paper only on the bottom. Bake for 25-30 minutes, or until a toothpick comes out clean. Let cool in the form until you’ll be using it.
- Prepare one batch passion fruit & lime curd, following the instructions here. Let it cool down, then pour in the Ø19cm spring form lined with cling film and place in the freezer for at least 4h before using it.


Phase 2 – building the cake
- After the cake sponge has cooled down and the curd has set in the freezer, you are ready to put the cake together. I like doing it the next day after prepping the elements. In a tiny bowl add the gelatin powder and the cold water and let it sit for 5-10 minutes. In the meantime, add the chocolate and the small portion of whipping cream in a heat resistant bowl and melt it over a bain marie. Make sure the boiling water is not touching the bottom of the bowl. When the chocolate has melted, set aside.
- Then melt also the bloomed gelatin. I like to also do it slowly over a bain marie (smaller bowl and pot, reusing the boiling water from the large bain marie for the choco). But you can just do it in a tiny pot over low heat. Add the melted gelatin to the chocolate and stir with a spatula or a silicone spoon until well incorporated. Let sit for 10-15 minutes, stirring from time to time, until continuing to the next step.
- Pour the cold whipping cream in a mixing bowl. Start whisking on medium-high speed until soft peaks start forming. Check the consistency from time to time. You want to get a light and soft creamy one. Not too stiff, as the gelatin will do its job and make it set. Add 2 tbsp. of the whipped cream to the melted chocolate which should not be that warm any longer. Keep en eye on it, as you don’t want it to get too cold and stiff either. Stir in with a spatula just until incorporated, then add to the whipped cream. Incorporate by hand, with gentle bottom to top movements, using a spatula.
- Place the silicone mold on a cutting board (you want it to be steady when moving around). Pour about half to 2/3 of the mousse in the mold, then place the it in the freezer, ideally in the fast freeze container, to set for about 20 minutes. That will help firm up a bit and hold the passion fruit curd insert without sinking.
- In the meantime use a cake cutting wire or a sharp long knife to level the dark cocoa cake sponge you baked previously.
- Remove the silicone mold from the freezer, pour the extra mousse in there (it will have set a bit meanwhile, so you might need a small spatula to distribute it evenly. Remove the passion fruit curd insert from the freezer and take it out of the plastic film. Place in the middle of the mousse and gently press it until the mousse raises to the same level with the curd ring. Then add the dark cocoa sponge on top of the curd, in the center. Gently press down until it levels up to the edges of the silicone form. There will be a little mousse excess, just remove it with a spatula. When everything is nicely even, place the silicone form in the freezer overnight. Don’t forget to use the cutting board underneath to keep it steady.


Phase 3 – cake decoration
- It’s time to prepare the mirror glaze. In a small bowl add the gelatine powder and the small portion cold water and let swell. Add the chocolate (chopped into small pieces if it comes in tablet or large chunks) into the tall blender cup and set aside.
- In a small pot add the condensed milk, sugar, water and cocoa powder. Place on a medium heat and stir with a whisk until everything is combined. Bring it just to a boil and remove from heat. Add the bloomed gelatine and stir until dissolved. Pour the hot mixture over the chocolate, and let sit for about 5 minutes, until the chocolate pieces have melted.
- Submerge the blender into the hot chocolate mixture and blend until smooth. Try to not keep the blender perpendicular on the surface, but under an angle. That will help you avoid getting air bubbles into the glaze. When you’re done blending, run the mixture through a fine sieve to get rid of small air bubbles and make sure it is all smooth. Place the thermometer into the glaze. You will need to pour the glaze over your frozen cake when it has a temperature between 37 and 35 C.
- When the temperature is almost there, take the cake out of the freezer and remove it from the silicone form. Place it on an upside-down cup or glass, above a tray where the excess glaze can drip. Pour the glaze once it goes under 37C (not lower than 35C), starting from closer to the edges and finishing in the center of the cake. That way you make sure the edges are well covered. When the glaze stops dripping, run a little pastry spatula or knife under the bottom edge, to remove the excess glaze hanging. with two long cake spatulas or two long knives lift the cake and place on a serving plate or on a round cake cardboard.
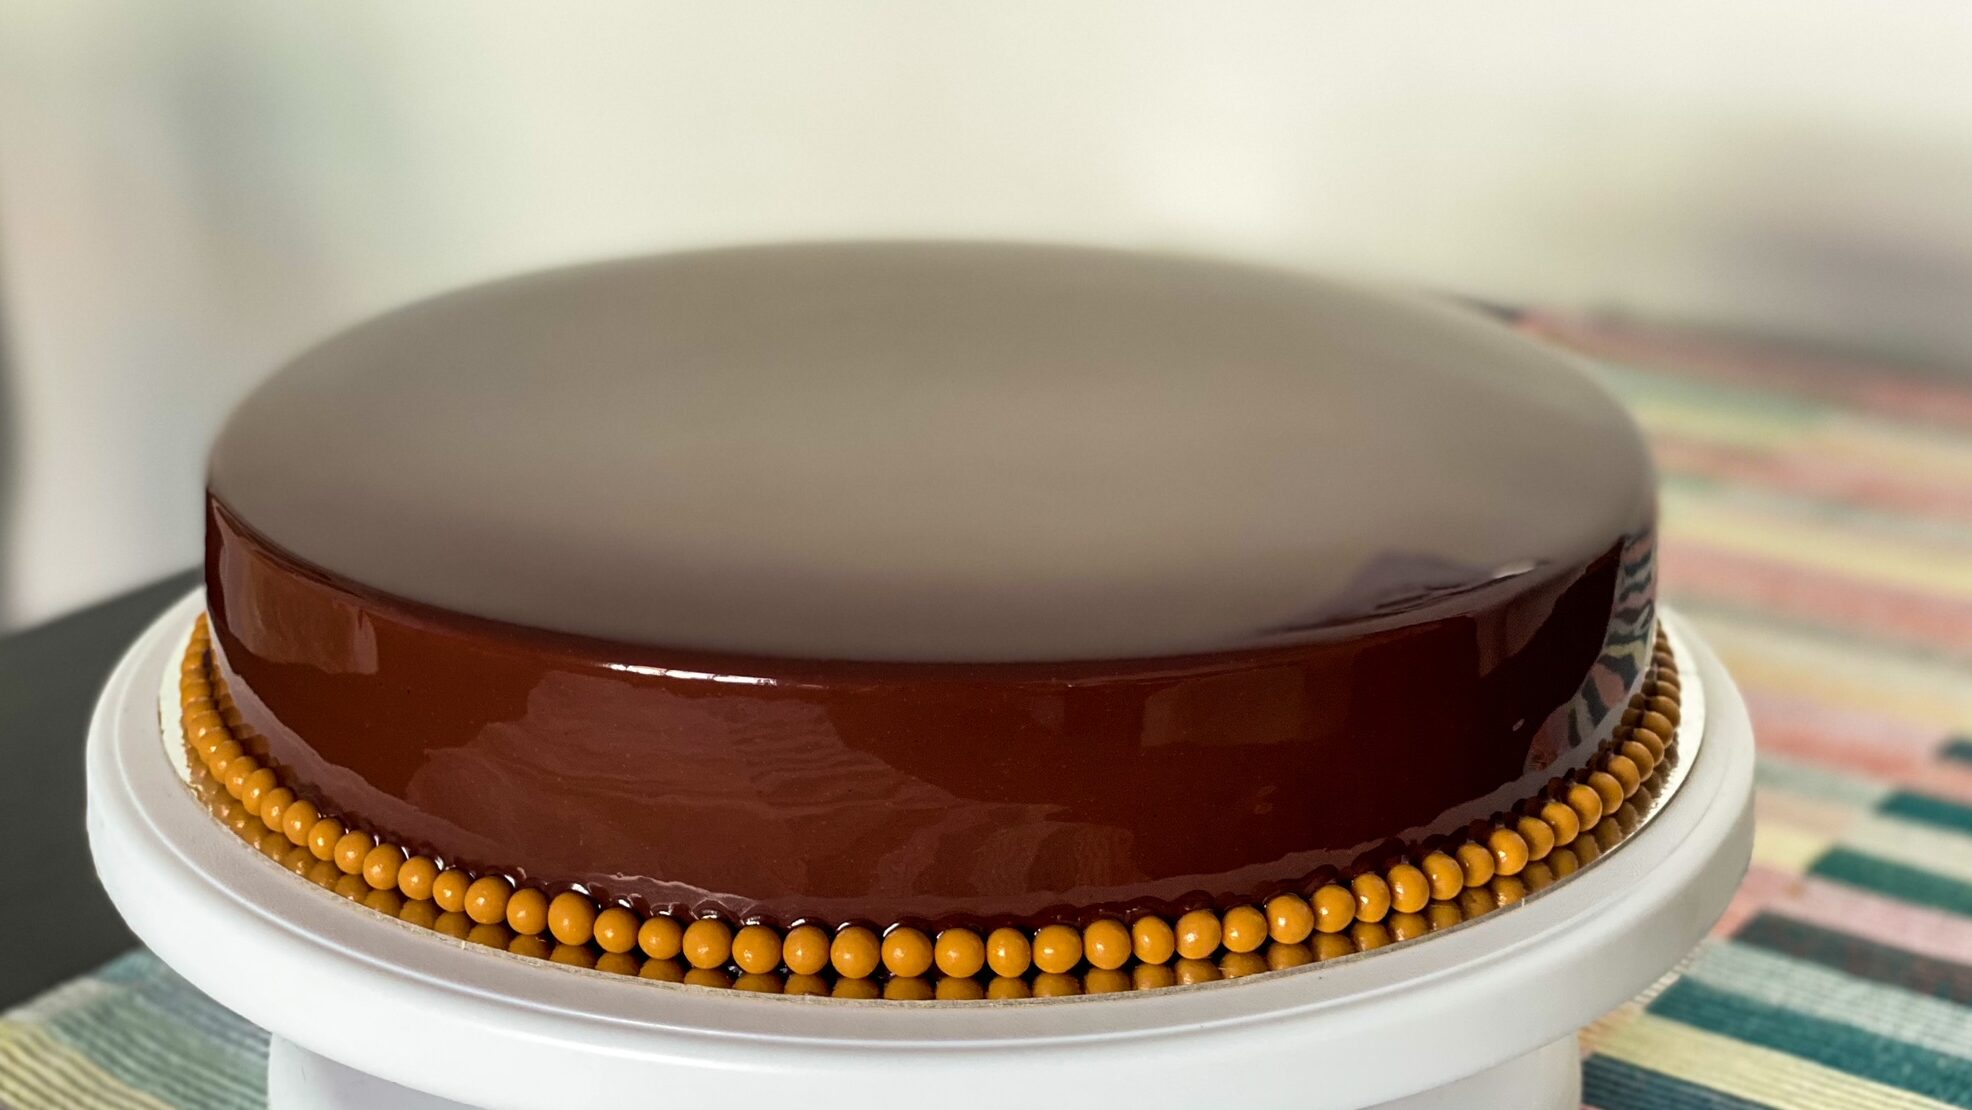
- Decorate simply with a necklace of crunchy dulcey pearls around the bottom of your mirror glaze cake, to cover the imperfections. Place in the fridge for about 4 hours before serving, so it will easily de-freeze. Admire the layers when cutting into it and enjoy!


TIP (for serving): keep a tall glass with hot water next to you, to heat the knife blade a bit before cutting into your mirror glaze cake. Pat dry, then cut. This will help getting a cleaner section, otherwise the dark chocolate glaze will colour the other layers underneath.
Chocolate and passion fruit mirror glaze cake
Equipment
- whisk
- 19cm Ø springform
- 22cm Ø springform
- heat resisting bowl
- 24cm Ø silicone mould
- stand or hand mixer with whisk attachment
- plastic film
- cake leveler/ cutting wire (optional)
- kitchen/ chocolate thermometer
- immersion blender and a tall cup
- a sieve
Ingredients
For the dark cocoa cake base:
- 100 g all-purpose flour
- 30 g pure cocoa powder
- 1/2 tsp baking powder
- 1/2 tsp baking soda
- 1 egg
- 1 pinch salt
- 100 g caster sugar
- 30 g vegetable oil
- 100 ml kefir (or yogurt)
- 100 ml boiling water
For the passion fruit and lime curd:
- 5-6 passion fruits
- 1-2 limes
- 6 egg yolks
- 1 whole egg
- 100 g caster sugar
- 30 g unsalted butter
For the mousse:
- 2 tsp gelatin powder
- 3 tbsp cold water
- 200 g caramelized white chocolate (or white chocolate) (I use Callebaut Gold callets)
- 140 g whipping cream
- 500 g whipping cream chilled
For the mirror glaze:
- 2 tsp gelatin powder heaped
- 50 ml cold water
- 100 g sweetened condensed milk
- 150 g caster sugar
- 25 g pure cocoa powder
- 100 ml water
- 175 g dark chocolate around 50% (I use Callebaut callets 54,5%)
Extra, for decoration:
- crunchy dulcey pearls
Instructions
Phase 1 – prep the element
- Bake the cake and prepare the passion fruit & lime curd 1-2 days ahead. Preheat oven to 170C (no fan). In a small bowl add the flour, cocoa, baking powder and baking soda, stir with a fork and set aside. Place some water to boil into a kettle. Meanwhile, place the egg, a pinch of salt and the sugar in a medium bowl and mix by hand with a whisk for a minute or two, until pale yellow. Add the oil and whisk again until you get a creamy consistency. Then add the kefir/yogurt and whisk again just until combined. Pour the boiling water while stirring with the whisk. Then run the flour and cocoa mixture through a sieve directly into the mixing bowl. Whisk until combined. You will get a runny batter, that is how it's supposed to be.
- Pour the batter into the Ø22cm spring form, lined with baking paper only on the bottom. Bake for 25-30 minutes, or until a toothpick comes out clean. Let cool in the form until you'll be using it.
- Prepare one batch passion fruit & lime curd, following the instructions here. Let it cool down, then pour in the Ø19cm spring form lined with cling film and place in the freezer for at least 4h before using it.
Phase 2 – building the cake
- In a tiny bowl add the gelatin powder and the cold water and let it sit for 5-10 minutes. In the meantime, add the chocolate and the small portion of whipping cream in a heat resistant bowl and melt it over a bain marie. When the chocolate has melted, set aside.
- Then melt also the bloomed gelatin and add to the melted chocolate mix. Stir until well incorporated then let sit for 10-15min., stirring from time to time.
- Pour the cold whipping cream in a mixing bowl. Start whisking on medium-high speed until soft peaks start forming. Check the consistency from time to time. You want to get a light and soft creamy one. Not too stiff, as the gelatin will do its job and make it set. Add 2 tbsp. of the whipped cream to the melted chocolate which should not be that warm any longer. Keep en eye on it, as you don't want it to get too cold and stiff either. Stir in with a spatula just until incorporated, then add to the whipped cream and fold gently.
- Place the silicone form on a cutting board (you want it to be steady when moving around). Pour about half to 2/3 of the mousse in the form, then place the it in the freezer, ideally in the fast freeze container, to set for about 20 minutes. That will help firm up a bit and hold the passion fruit curd insert without sinking.
- In the meantime use a cake cutting wire or a sharp long knife to level the dark cocoa cake sponge you baked previously.
- Remove the silicone mould from the freezer, pour the extra mousse in there (it will have set a bit meanwhile, so you might need a small spatula to distribute it evenly. Remove the passion fruit curd insert from the freezer and take it out of the plastic film. Place in the middle of the mousse and gently press it until the mousse raises to the same level with the curd ring. Then add the dark cocoa sponge on top of the curd, in the center. Gently press down until it levels up to the edges of the silicone form. There will be a little mousse excess, just remove it with a spatula. When everything is nicely even, place the silicone mold in the freezer overnight. Don't forget to use the cutting board underneath to keep it steady.
Phase 3 – decoration
- In a small bowl add the gelatin powder and the small portion cold water and let swell. Add the chocolate (chopped into small pieces if it comes in tablet or large chunks) into the tall blender cup and set aside.
- In a small saucepan add the condensed milk, sugar, water and cocoa powder. Place on a medium heat and stir with a whisk until everything is combined. Bring it just to a boil and remove from heat. Add the bloomed gelatin and stir until dissolved. Pour the hot mixture over the chocolate, and let sit for about 5 minutes, until the chocolate pieces have melted.
- Submerge the blender into the hot chocolate mixture and blend until smooth. Try to not keep the blender perpendicular on the surface, but on an angle. That will help you avoid getting air bubbles into the glaze. When you're done blending, run the mixture through a fine sieve to get rid of small air bubbles and make sure it is all smooth. Place the thermometer into the glaze. You will need to pour the glaze over your frozen cake when it reaches a temperature between 37 and 35 C.
- When the temperature is almost there, take the cake out of the freezer and remove it from the silicone form. Place it on an upside-down cup or glass, above a tray where the excess glaze can drip. Pour the glaze once it goes under 37C (not lower than 35C), starting from closer to the edges and finishing in the center of the cake. That way you make sure the edges are well covered. When the glaze stops dripping, run a little pastry spatula or knife under the bottom edge, to remove the excess glaze hanging. with two long cake spatulas or two long knives lift the cake and place on a serving plate or on a round cake cardboard.
- Decorate simply with a necklace of crunchy dulcey pearls around the bottom of your mirror glaze cake, to cover the imperfections. Place in the fridge for about 4 hours before serving, so it will easily de-freeze. Admire the layers when cutting into it and enjoy!
One question: didn’t have passion fruit, so i used 100ml lemon juice, and I had to use 5 egg yolks+one egg… the curd tasts so yummy, a bit sour which i love. Does it affect all these changes that i made??!!
I will rate it tomorrow night once I finished it and after my guests reaction, so far everything seems to be going well and individually all parts are delicious I soooo look forward to the outcone
This is by far one of the best cakes I’ve ever had! It has a perfect smooth texture and an awesome combination of chocolate and fruit ❤️.
An absolute must try in this lifetime!