This was a very popular cake bake in the Romanian homes when I was a child. Probably because apples were a fruit everyone had at home, be it from their own backyard or from the grandparents garden at the country side. However, it wasn’t that popular in my home. And by that I mean that my mom never baked this upside-down caramelized apple cake. But I enjoyed a slice of it each time one of my aunties baked it.
It was this summer I baked it myself for the first time. I baked it to share with my gang of Romanians here in Copenhagen, the first time we managed to get together after the pandemic. It was funny how everyone could more or less relate to this upside-down caramelized apple cake. However, baking it now, when apple season is in full swing, is the best. And Danish apple make super delicious deserts. Tried them before in Tarte Tatin, apple pies or apple compote over some fluffy pancakes. They’re just yummy!
But back to our upside-down caramelized apple cake – it’s an easy bake that you can quickly improvise in a couple of hours. Serving it chilled from the fridge with some vanilla whipped cream it makes a light and fresh desert that will for sure please your guests.
Ingredients (10-12 servings)
For the caramelized apples:
- 100g sugar
- 25g butter
- 6-7 small-medium apples (I used Danish Discovery apples, try to use a sort that is a bit tart, they will pair so well with the rest)
- 50ml Amaretto/ rum (I would normally use a tasty rum, but we had ran out of it, so I improvised with some Amaretto Disarono)
- 1tsp lemon zest (fresh or from your citrus preserve)
- optional: orange syrup/ orange liqueur (fx. Grand Marnier, Cointreau)
For the sponge:
- 5 eggs
- a pinch of salt
- 125g sugar
- 125g flour
- 1tsp good vanilla sugar or vanilla extract
- optional: 50-70g pecan nuts
For serving:
- whipping cream, chilled
- 1tsp vanilla extract
Tools
- a 20cm Ø ovenproof pot – do not use a spring form or a tin with removable bottom, you don’t want the juices to escape – I use the same pot as the one for the crème caramel
- an apple corer – it is really helpful, I also tried without, and it really makes a difference
- a pastry brush
- hand or stand mixer
- sieve
- a spatula
Instructions
1. Choose the number of apples that can fit in your oven proof pot. Peel and core the apples and set aside. Preheat the oven at 200C (no ventilation). In the oven proof pot add the sugar and place over medium heat. Let the sugar melt and get to nice amber colour. Once it has caramelized and there are no more crystals, add the cold butter and stir until incorporated. Watch out for the steam, don’t stay to close to the pot. Remove from heat.
2. Place the apples on the bottom of the pot, in the caramel sauce. Just arrange them the way you will want to see them when you’ll turn them upside down. Careful not to burn yourself. In a small bowl add the amaretto liquor/ rum and the lemon zest. You can either use freshly grated zest or from your own citrus zest preserve. I like to use lemon zest from my preserve, as it also has a hint of vanilla. With this mix, brush the apples on the top towards you. Place the pot in the oven and bake for 30min.
3. If you like some extra crunch in your cake, now you can quickly toast them in a pan. I’ve copped the pecan nuts with a knife first, then toasted in a non-stick pan for a couple of minutes. Once roasted, remove from heat and set aside.
4. Start weighing the ingredients and separate the eggs. In a large bowl add the egg whites and a pinch of salt and start mixing on medium-high speed until soft peaks form. Then start adding the sugar spoon by spoon, separated by about 30sec, while mixing on (just under) medium speed. Then add the vanilla sugar/ extract and increase the speed of the mixer to high. Mix until stiff peaks form and it looks glossy – just like for a meringue. Add the egg yolks one after another and mix on medium speed, just until incorporated (1 minute or so).
5. Now that you’re done with the mixer, sift the flour on top of the eggs and sugar mixture, and use a spatula to incorporate with gentle bottom to top movements. Try not to lose the air from your mixture. Once you’re done incorporating the flour, add the extras (pecan nuts) and fold a couple more times with the spatula.
6. Your batter should be ready around the time the apples should come out of the oven. Brush the hot baked apples with apple syrup (or other kind of syrup if you have any, this is optional, I just happened to have some laying around in my fridge). Pour the batter on top of the caramelized apples and level it. Shake the pot a bit so the batter can get in the wholes in the apples and between the apples. Place the pot back in the hot oven and reduce to 190C. Bake for around 30 more minutes, or until the sponge has raised and has a nice golden-brown top.
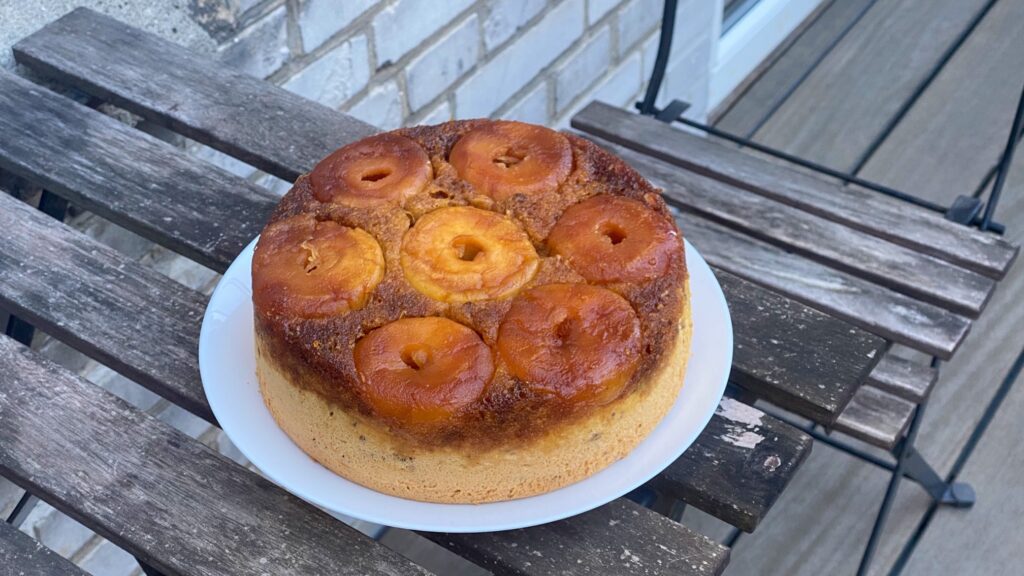
7. Let the cake rest in the pot for 10-15 minutes. Then run a small knife between the sponge and the edges of the pot. Place a plate large enough to accommodate the cake on top of the pot, and with a quick move, turn it upside-down. Try using a plate that can collect the caramel sauce, if any left unabsorbed by the fluffy sponge. Now take a moment to admire and soak in the smell of your beautiful upside-down caramelized apple cake. If the top of the cake is a bit wobbly, you can place a cake ring around it and let it cool down like that. Let it cool down for a couple of hours at room temperature, then transfer to the fridge and let cool for at least 4-6 hours, ideally overnight.


8. When the cake has chilled and set, you can whip the cream with a teaspoon of good vanilla extract. Use it to decorate the cake, or just as a side for everyone to take, to their liking. I have discovered it’s best to leave the whipped cream on the side, so everyone can choose whether to use it or not. Plus, I like a nice rustic naked cake, and it’s easy to calculate the portions when you see the apples. You can also have some extra caramel sauce or ground cinnamon on the side (or sprinkle on top if decorating it), in case anyone has a really sweet tooth or likes things spiced up a bit.
PS. I didn’t manage to take photos of the process just yet, as I was in a rush each time I’ve baked this cake so far. But I promise to do it and update on the next occasion. Also, no photos of the section, as the cakes were taken to parties and everybody was busy eating their slice. I’ll try harder next time.
Happy baking, everyone!